This is translation of Slack Next-gen Platform – Custom Functions” written by Kaz (SDK Engineering & DevRel at Slack), I do not include any personal opinion here except guessing when meaning of original text is not clear for me)
이 글은 슬랙의 SDK Engineering / DevRel 인 Kaz 의 글을 번역한것입니다. 저의 개인 의견은 들어가지 않으며, 일부 원문의 의미가 애매한 경우에만 부연 설명을 달았습니다.
이 튜토리얼에서는 Slack 의 차세대 플랫폼에서 어떻게 “커스텀 펑션” 을 추가하는지 배워볼 것입니다. 이 튜토리얼의 목표는 빌트인 “SendMessage” 펑션과 동일한 커스텀 펑선을 추가하는 방법에 대해서 이해하는 것입니다.
Prerequisites (준비사항)
차세대 플랫폼을 접하는 것이 처음이시라면, 이전의 튜토리얼인 “The Simplest Hello World” 부터 읽어주세요. 요약하면 유료 Slack 워크스페이스와 해당 워크스페이스에서 “beta feature” 를 사용할 수 있는 권한이 필요합니다. 가지고 계시다면 Slack CLI 와 워크스페이스를 연결하기만 하면 됩니다.
준비되었다면 앱을 한번 만들어보도록 하죠. 시작해보겠습니다.
Create a Blank Project
slack create 명령어를 사용하여, 새로운 프로젝트를 시작할 수 있습니다. 이 튜토리얼에서는 아무것도 없는 상태에서 앱을 만들어보겠습니다. “Blank Project” 를 선택하여 주십시요.
$ slack create
? Select a template to build from:

  Hello World
  A simple workflow that sends a greeting

  Scaffolded project
  A solid foundational project that uses a Slack datastore

> Blank project
  A, well.. blank project

  To see all available samples, visit github.com/slack-samples.
프로젝트가 생성되면, slack run 명령어가 정상적으로 동작하는지 확인해보세요. 이 명령어는 “dev” 버전의 앱을 워크스페이스에 설치합니다. 이 앱의 봇 유저가 생성되고, 이 봇은 API 호출을 위한 봇 토큰 값을 가지고 있습니다.
$ cd affectionate-panther-654
$ slack run
? Choose a workspace  seratch  T03E94MJU
   App is not installed to this workspace

Updating dev app install for workspace "Acme Corp"

⚠️  Outgoing domains
   No allowed outgoing domains are configured
   If your function makes network requests, you will need to allow the outgoing domains
   Learn more about upcoming changes to outgoing domains: https://api.slack.com/future/changelog
✨  seratch of Acme Corp
Connected, awaiting events
Connected, awaiting events 로그 메세지를 보신다면, 이 앱이 성공적으로 워크스페이스에 연결된 것입니다. “Ctrl +C” 를 눌러 로컬 앱 프로세스를 종료합니다.
Create a Workflow
커스텀 펑션을 추가하는 방법을 배우기 위해서, 빌트인 펑션이 있는 간단한 워크플로를 만들어보도록 하죠. 이전 튜토리얼 에서 하신 것처럼 workflow_and_trigger.ts 파일을 만들겠습니다.
// -------------------------
// Workflow definition
// -------------------------
import { DefineWorkflow, Schema } from "deno-slack-sdk/mod.ts";
export const workflow = DefineWorkflow({
  callback_id: "custom-function-demo-workflow",
  title: "Custom Function Demo Workflow",
  input_parameters: {
    properties: { channel_id: { type: Schema.slack.types.channel_id } },
    required: ["channel_id"],
  },
});

// Send a message in a channel using the built-in function
workflow.addStep(Schema.slack.functions.SendMessage, {
  channel_id: workflow.inputs.channel_id,
  message: "Hello World!",
});

// -------------------------
// Trigger Definition
// -------------------------
import { Trigger } from "deno-slack-api/types.ts";
const trigger: Trigger<typeof workflow.definition> = {
  type: "shortcut",
  name: "Custom Function Demo Trigger",
  workflow: `#/workflows/${workflow.definition.callback_id}`,
  inputs: { channel_id: { value: "{{data.channel_id}}" } },
};
export default trigger;
manifest.ts 에 워크플로 추가하는 것도 잊지 마세요
import { Manifest } from "deno-slack-sdk/mod.ts";
// Import the workflow you've just created
import { workflow as CustomFunctionDemo } from "./workflow_and_trigger.ts";

export default Manifest({
  name: "affectionate-panther-654",
  description: "Hello World!",
  icon: "assets/default_new_app_icon.png",
  // Add the imported workflow here
  workflows: [CustomFunctionDemo],
  outgoingDomains: [],
  botScopes: ["commands", "chat:write", "chat:write.public"],
});
slack run 명령어를 실행했을때 아무런 에러 메세지가 발생하지 않는다면, “link” 트리거를 만들어보겠습니다. slack triggers create –trigger-def ./workflow_and_trigger.ts 명령어를 실행하면 두가지 옵션을 선택할 수 있는데 (dev) 가 달린것으로 선택해주세요.
$ slack triggers create --trigger-def ./workflow_and_trigger.ts
? Choose an app [Use arrows to move, type to filter]
seratch T03E94MJU
App is not installed to this workspace
> seratch (dev) T03E94MJU
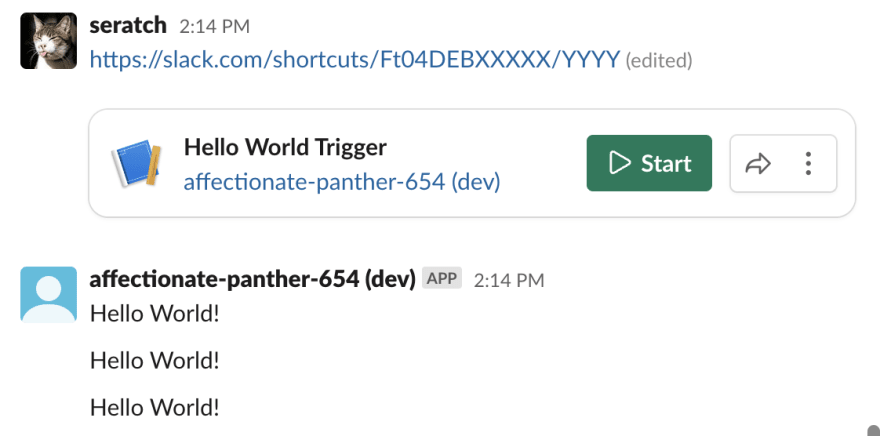
affectionate-panther-654 (dev) A04DHV08MPF모든 것이 잘 되었다면 link 트리거 주소를 얻으실 수 있습니다.
$ slack triggers create --trigger-def ./workflow_and_trigger.ts
? Choose an app  seratch (dev)  T03E94MJU
   affectionate-panther-654 (dev) A04DHV08MPF

⚡ Trigger created
   Trigger ID:   Ft04DEBXXXX
   Trigger Type: shortcut
   Trigger Name: Custom Function Demo Trigger
   URL: https://slack.com/shortcuts/Ft04DEBXXXXX/YYYY
이 link 를 연결된 워크스페이스 내의 채널에 메세지로 남기면, 메세지에 포함된 버튼을 보실 수 있습니다. 이 버튼을 누를 때마다 “Hello World!” 메세지가 채널에 남는것을 볼 수 있습니다.
특별한 것은 없죠. 다음으로 넘어가보도록 하겠습니다.
Add Your First Custom Function my_send_message.ts
아마 이미 만들어둔 workflow_and_trigger.ts 파일 내에 커스텀 펑션을 추가하시고 싶으실 수 있을텐데요. 안타깝게도 기존에 존재하는 파일에 펑션을 추가할 수는 없습니다.
그 이유는 플랫폼에서 default export of SlackFunction() 이 호출될 때, source_file 경로에서 펑션의 핸들러 코드를 찾기 때문입니다. 그래서 커스텀 펑션별로 별도의 소스파일이 필요합니다.
my_send_message.ts 를 만들고 다음 내용을 채워넣습니다.
import { DefineFunction, Schema, SlackFunction } from "deno-slack-sdk/mod.ts";
import { FunctionSourceFile } from "https://deno.land/x/deno_slack_source_file_resolver@0.1.5/mod.ts";

export const def = DefineFunction({
  callback_id: "my_send_message",
  title: "My SendMessage",
  source_file: FunctionSourceFile(import.meta.url),
  input_parameters: {
    properties: {
      channel_id: { type: Schema.slack.types.channel_id },
      message: { type: Schema.types.string },
    },
    required: ["channel_id", "message"],
  },
  output_parameters: {
    properties: { ts: { type: Schema.types.string } },
    required: ["ts"],
  },
});

export default SlackFunction(def, async ({ inputs, client }) => {
  const response = await client.chat.postMessage({
    channel: inputs.channel_id,
    text: inputs.message,
  });
  console.log(`chat.postMessage result: ${JSON.stringify(response, null, 2)}`);
  if (response.error) {
    const error = `Failed to post a message due to ${response.error}`;
    return { error };
  }
  return { outputs: { ts: response.ts } };
});
그리고 나서, 이전에 만들어둔 워크플로의 빌트인 펑션을 새로 만든 커스텀 펑션으로 교체할 수 있습니다. workflow_and_trigger.ts 파일을 다음과 같이 편집하세요
// -------------------------
// Workflow definition
// -------------------------
import { DefineWorkflow, Schema } from "deno-slack-sdk/mod.ts";
export const workflow = DefineWorkflow({
  callback_id: "custom-function-demo-workflow",
  title: "Custom Function Demo Workflow",
  input_parameters: {
    properties: { channel_id: { type: Schema.slack.types.channel_id } },
    required: ["channel_id"],
  },
});

// Replace the built-in function with your own one below
/*
// Send a message in a channel using the built-in function
workflow.addStep(Schema.slack.functions.SendMessage, {
  // Set the channel ID given by trigger -> workflow
  channel_id: workflow.inputs.channel_id,
  message: "Hello World!",
});
*/

// Import your own ./my_send_message.ts and use the function instead
import { def as MySendMessage } from "./my_send_message.ts";
workflow.addStep(MySendMessage, {
  channel_id: workflow.inputs.channel_id,
  message: "Hello World!",
});
다시한번 채널에서 워크플로를 트리거 해보면 똑같은 방식으로 동작하는 것을 보실 수 있습니다. 또한 slack run 터미널 윈도우에서 다음과 같은 로그메세지가 출력될 것입니다.
chat.postMessage result: {
  "ok": true,
  "channel": "C04FB5UF1C2",
  "ts": "1671685040.050449",
  "message": { ... }
}
2022-12-22 13:57:19 [info] [Fn04G9TKNS91] (Trace=Tr04FVF67P3R) Function execution started for workflow function 'Custom Function Demo Workflow'
2022-12-22 13:57:19 [info] [Wf04GZN08DT2] (Trace=Tr04G9TSDRKM) Executing workflow step 1 of 1
2022-12-22 13:57:19 [info] [Fn04G3DBBWA2] (Trace=Tr04G9TSDRKM) Function execution started for app function 'My SendMessage'
2022-12-22 13:57:20 [info] [Fn04G3DBBWA2] (Trace=Tr04G9TSDRKM) Function execution completed for function 'My SendMessage'
2022-12-22 13:57:21 [info] [Wf04GZN08DT2] (Trace=Tr04G9TSDRKM) Execution completed for workflow step 'My SendMessage'
2022-12-22 13:57:21 [info] [Fn04G9TKNS91] (Trace=Tr04FVF67P3R) Function execution completed for function 'Custom Function Demo Workflow'
2022-12-22 13:57:21 [info] [Wf04GZN08DT2] (Trace=Tr04G9TSDRKM) Execution completed for workflow 'Custom Function Demo Workflow'
console.log 출력물에 아웃풋이 먼저 찍히고 워크플로 레벨의 로그 메세지가 뒤늦게 찍히는 것을 보고 왜이러지 하실 수 있는데요, 해깔려하시는게 맞습니다. 원래 생각하시는바와 같이 로그메세지가 먼저 찍히고, 그 다음 아웃풋이 찍혀야 하는게 맞죠. 서버사이드의 로그메세지가 늦게 찍히는 이유는 로그메세지를 Slack 의 클라우드 인프라에서 가져오면서 랙이 발생하기 때문입니다. 추후에는 개선될 수도 있겠지만, 현재는 이렇게 되는 이유를 알아두실 필요가 있겠습니다.
또한, 커스텀 펑션을 이용해서 메세지를 보냈을 때 메세지를 보내는 사람의 아이콘 이미지가 정상적으로 보이지 않는 것을 보셨을 수도 있는데요, 이것은 플랫폼의 버그이며 (dev) 버전의 앱에서만 발생합니다. slack deploy 명령어를 사용해서 프로덕션 앱을 배포하게 되면, 정상적인 아이콘 이미지를 보실 겁니다. 현재 이 문제를 해결하기 위한 워크어라운드로 “icon url” 파라미터를 사용하실 수 있습니다. manifest.ts 파일 내의 botScopes 항목에 chat:write.customize 권한을 넣어주시고, my_send_message.ts 를 통해 chat.PostMessage API 를 호출할 때 icon_url 을 넘겨주시면 됩니다.
커스텀 펑션을 개발하는 방법에 대해서 좀 더 상세한 내용을 공유해드리기 위해서, 다음과 같이 코드내에 최대한 많은 코멘트를 남겨두었습니다. 코멘트를 보시면, 펑션내의 코드별로 어떤 역할을 하는지 아실 수 있으실 것입니다.
import { DefineFunction, Schema, SlackFunction } from "deno-slack-sdk/mod.ts";
import { FunctionSourceFile } from "https://deno.land/x/deno_slack_source_file_resolver@0.1.5/mod.ts";

// Define the metadata of the function:
// No need to be `def`. Any names work for you
export const def = DefineFunction({
  callback_id: "my_send_message",
  title: "My SendMessage",
  // Pass the relative path to this file from the project root directory:
  // If you place this under functions/ directory, the string can be funtions/my_send_message.ts
  // source_file: "my_send_message_with_comments.ts",

  // A 3rd party module "deno_slack_source_file_resolver" automatically resolves the relative path
  source_file: FunctionSourceFile(import.meta.url),

  // Define all the possible inputs with their names and types:
  // Having a description would be helpful for long-term maintenance, but it's optional.
  // You can access the properties inside your function handler code.
  input_parameters: {
    properties: {
      // When setting `Schema.slack.types.channel_id` as the type here,
      // the workflow engine verifies the format of given data.
      // If it's not a channel string, the workflow execution can be terminated as a failure.
      channel_id: { type: Schema.slack.types.channel_id },
      // This general string type accepts any string data,
      message: { type: Schema.types.string },
    },
    // Having the property names ensures they're always available for the handler execution.
    required: ["channel_id", "message"],
  },
  // Define all the possible outputs when the function execution succeeds:
  // When it fails, and you'd like to terminate the workflow execution immediately, your function code should return an error string instead outputs.
  // Otherwise, it's also a good approach to include some error state in outputs,
  // and then let the following functions handle the error outcome.
  output_parameters: {
    properties: { ts: { type: Schema.types.string } },
    // When a property is listed here, your handler code must return the property as part of outputs. TS compiler verifies this for you.
    required: ["ts"],
  },
});

// The default export of the `SlackFunction()` call result is required to make it available for workflows.
// You can pass the above "definition" object as the first argument.
// The second argument is the handler function, which executes the function's logic.
// Also, it must be compatible with the definition's inputs/outputs.
export default SlackFunction(def, async ({
  // All the possible arguments as of this writing
  event, // all the metadata on this function execution event
  inputs, // the properties defined in input_parameters
  env, // we don't use this time, but you can set secrets by slack env command
  team_id, // The connected workspace's ID
  enterprise_id, // The connected Enterprise Grid Org's ID (if that's not the case, this property can be an empty string)
  client, // Slack API client -- if you need direct access to its bot token, you can have `token` as well
}) => {
  // Print everything just to use all the arguments
  console.log(JSON.stringify({ event, inputs, env, team_id, enterprise_id }));
  // Call chat.postMessage API to post a message in a channel
  const response = await client.chat.postMessage({
    channel: inputs.channel_id,
    text: inputs.message,
  });
  console.log(`chat.postMessage result: ${JSON.stringify(response, null, 2)}`);
  if (response.error) {
    // Terminate the workflow execution due to this error
    const error = `Failed to post a message due to ${response.error}`;
    return { error };
  }
  // Return a successful result in the outputs
  return { outputs: { ts: response.ts } };
});
Wrapping Up
이 튜토리얼을 통해 다음 두가지를 배워보았습니다.
- 커스텀 펑션을 만드는 방법
- 워크플로에 커스텀 펑션을 추가하는 방법
튜토리얼에 사용된 프로젝트는 다음 링크에서 확인하실 수 있습니다. https://github.com/seratch/slack-next-generation-platform-tutorials/tree/main/02_Custom_Functions
튜토리얼을 즐기셨기를 바라며, 피드백이나 코멘트가 있으시다면 트위터 (@seratch) 로 연락주시거나, 여기 남겨주세요.
Happy hacking with Slack’s next-generation platform 🚀