안녕하세요. 정~말 오랜만에 글을 남깁니다.
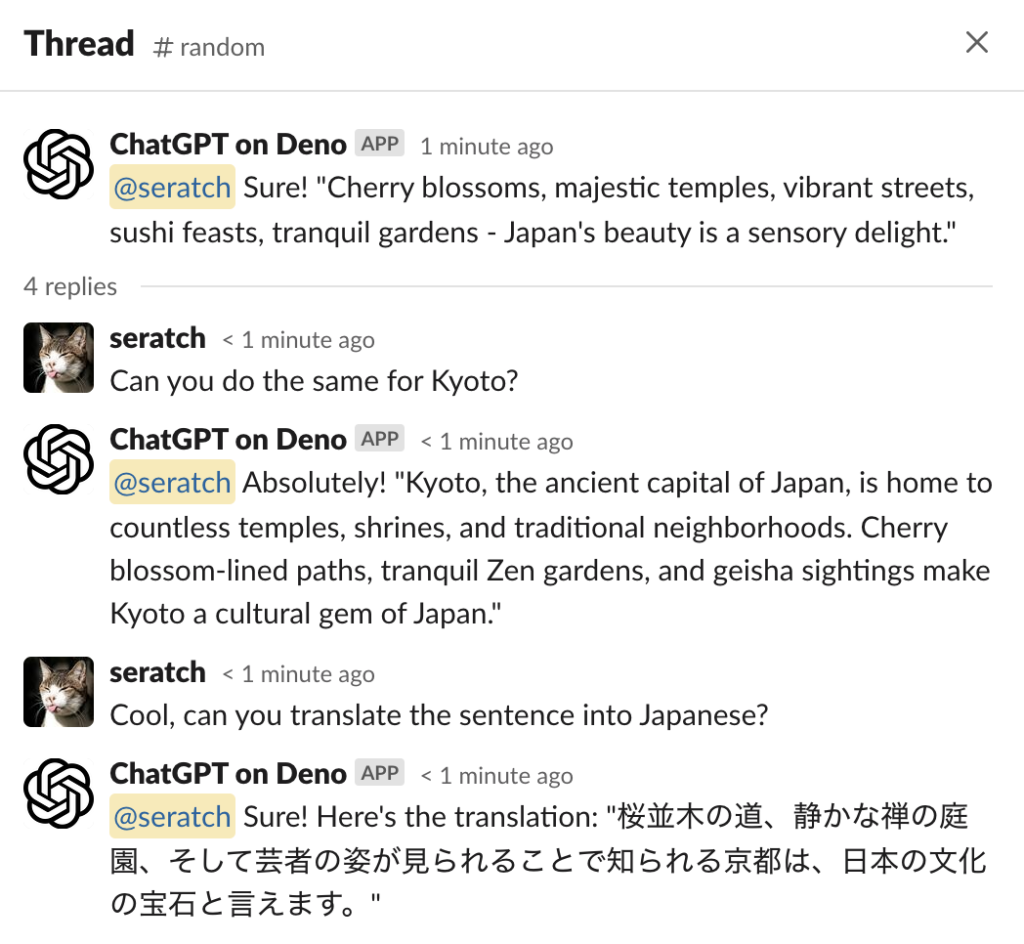
오늘은 Slack 의 Platform 2.0 의 기능중 하나인, Custom Step 을 활용하여, Workflow 를 한번 꾸며보는 것을 소개해드리고자 합니다. 기억이 가물가물하긴 한데, 이전에 아마 ROSI 환경 (Run On Slack Infrastructure) 에서 사용할 수 있는 deno SDK 를 사용하여, ChatGPT 의 API 를 활용하여, Gen AI 를 통해 질문에 App 을 만드는 부분에 대해서 한번 소개해드렸던 기억이 나는데요. (https://byounghee.me/2023/02/18/ask-openai-in-slack/) 채널에 앱을 초대하고, 해당 앱 이름을 멘션하여 ChatGPT 로부터 응답을 받아오는 그런 구조 였습니다.
오늘은 위와 비슷하지만, Workflow 의 Custom Step 로 만들어보겠습니다. 먼저 Slack CLI 와 Deno Extension 설치는 필요합니다. 그리고 이번 예제에서도 ChatGPT 를 LLM 으로 사용하겠습니다.
자 시작해보죠.
Creating Your Slack App
먼저 slack CLI 를 사용하여 새로운 앱을 만들어 줍니다. 저는 chatgpt-wfb 라고 만들었지만 원하는대로 정하시면 됩니다.
byounghee.kim@byoungh-ltm7jqg slack_app % slack create chatgpt-wfb
? Select a template to build from: [Use arrows to move]

  Issue submission (default sample)
  Basic app that demonstrates an issue submission workflow

  Scaffolded template
  Solid foundation that includes a Slack datastore

❱ Blank template
  A, well.. blank project

  View more samples

  Guided tutorials can be found at api.slack.com/automation/samples
Blank Template 를 선택. 그럼 chatgpt-wfb 폴더가 생성됩니다.
Setting Up Your AI Connection
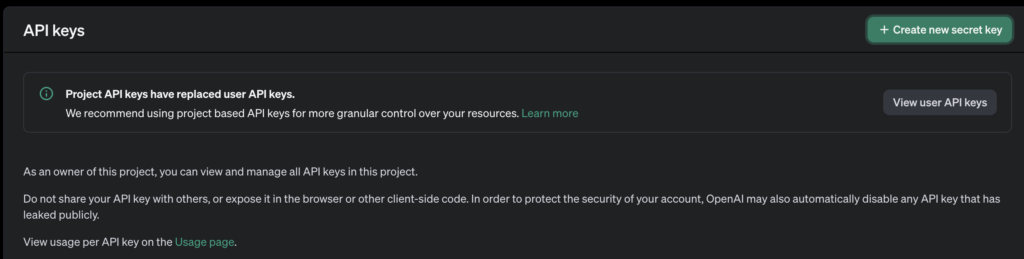
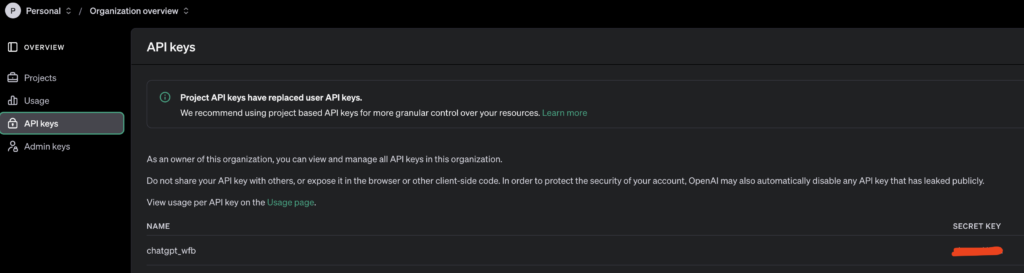
다음은 Open AI 에서 API 키를 발급받습니다. https://platform.openai.com/api-keys 로 접속 후 create a new secret key 선택, Open AI 의 경우 API 키를 발급받을려면 아마 무료는 안되고 적게나마 비용을 내셔야 할겁니다.
요 예제에서는 ChatGPT 를 예제로 사용하지만, 실제로는 Gemini / Claude3 / Llama 3 / Coral 이나 또는 자사에서 보유하고 있는 LLM 을 쓰셔도 상관은 없겠지요.
Adding Environment Variables
다음은 위에서 발급받은 API 키를 환경변수로 넣습니다. Local 에서 실행할때는 .env 파일에다가 하드코딩을 하지만, 실제로 ROSI 환경에서 기동할때는 하드코딩을 하지 않고 커맨드를 통해 입력할 것입니다.
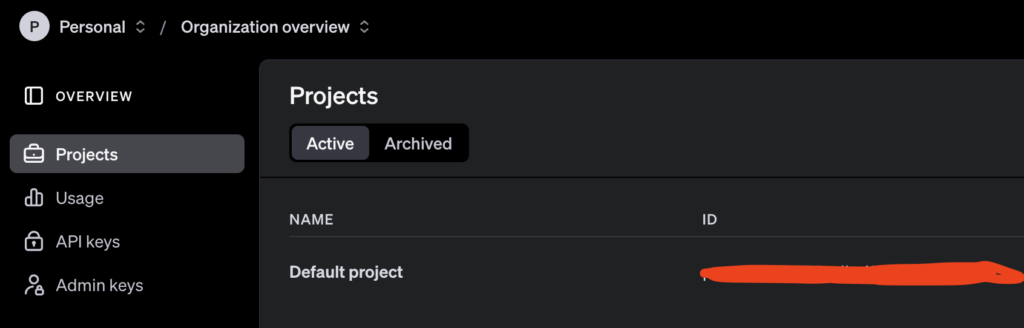
.env 파일을 만들고 OPEN_AI_KEY 와 Project ID 값을 입력합니다. (OpenAI Deno 패키지 v4.56.0 버전 기준 필요), 로컬에서 실행할때는 KEY만 있으면 되는데 ROSI 에서 실행할때는 Project ID 도 같이 넣어줘야 합니다.
OPEN_AI_KEY={YOUR_KEY_HERE}
OPENAI_PROJECT_ID={YOUR_PROJECTID_HERE}
ROSI 환경에 배포할 때는 아래 명령어를 통해 API 를 넣습니다.
slack env add OPEN_AI_KEY {YOUR_KEY_HERE}
slack end add OPENAI_PROJECT_ID {YOUR_PROJECTID_HERE}
Writing Your AI Function
준비가 됐으면 실제 코드를 넣어보겠습니다. 먼저 앱의 폴더내에서 functions 라는 이름의 폴더를 생성합니다. 그리고 answer_prompt.ts 라는 파일을 생성 합니다.
그리고 해당 앱이 ChatGPT 와 통신하기 위해서는 관련된 패키지의 import 가 필요하며 https://deno.land/x/openai@v4.56.0 (8월 28일자 기준 Latest)에서 가지고 올 수 있습니다. 혹시 ChatGPT 말고 다른 LLM 을 사용하신다면 관련된 deno 패키지가 존재하는지 확인해보시면 되겠습니다.
answer_prompt.ts 파일을 오픈하고, 다음과 같이 패키지를 import 합니다.
import { DefineFunction, Schema, SlackFunction } from "deno-slack-sdk/mod.ts";
import OpenAI from "https://deno.land/x/openai@v4.56.0/mod.ts";
Defining the Function
다음은 Function 을 정의할 차례 입니다. 다음 코드를 넣어주세요. 각 항목에 대한 설명은 주석으로 달겠습니다.
export const AnswerPromptDefinition = DefineFunction({
  callback_id: "answer_prompt", // 해당 Custom function 의 고유 ID
  title: "사용자의 질문에 답변하세요", // 표시될 해당 Custom Step 의 이름
  description: "입력된 사용자의 질문에 LLM 을 사용하여 답변 합니다.", // 해당 Custom step 에 대한 설명
  source_file: "functions/answer_prompt.ts",
  input_parameters: { // Workflow Builder 를 통해 받는 입력
    properties: {
      prompt: { // 사용자 입력 값
        type: Schema.types.string,
        description: "ChatGPT Prompt",
      },
    },
    required: ["prompt"], // 사용자 입력값이 반드시 존재해야함 required field
  },
  output_parameters: { // Custom step 을 통한 출력값
    properties: {
      response: { // LLM 을 통해서 나온 출력값
        type: Schema.types.string,
        description: "The response from the LLM",
      },
    },
    required: ["response"], // LLM 을 통해서 나온 값이 반드시 입력되어야 함. required field
  },
});
Writing the Function Logic
다음은 Function 의 로직에 대해 작성할 차례 입니다. 즉 Function 이 호출되었을 때 실행되는 부분이라고 보시면 되겠습니다. 이전 단계에서 AnswerPromptDefinition 이라는 이름의 Function 을 정의하였습니다.
export default SlackFunction(
  AnswerPromptDefinition,
  async ({ inputs, env }) => {
    const { prompt } = inputs;

    const openAiKey = env["OPEN_AI_KEY"];
    const openAiProjectID = env["OPENAI_PROJECT_ID"];
    const openai = new OpenAI({
      apiKey: openAiKey,
      baseURL: "https://api.openai.com/v1",
      project: openAiProjectID,
      organization: null,
    });

    const chatCompletionResponse = await openai.chat.completions.create({
      model: "gpt-4o-mini",
      messages: [
        {
          role: "system",
          content: "You are a helpful assistant",
        },
        {
          role: "user",
          content: prompt,
        },
      ],
    });
    const response = chatCompletionResponse.choices[0].message?.content || "";
    console.log(chatCompletionResponse.model); // 현재 사용중인 모델을 콘솔창에 출력
    return { outputs: { response } };
  },
);
위의 로직에서 이전에 생성한 API 키를 생성하여 Open AI 의 API 를 호출합니다. 저는 gpt-4o-mini 를 사용하겠습니다.
현재 open AI 패키지 버전 기준으로, 3가지 값이 필요합니다.
– OpenAI API Key
– OpenAI Project ID
– OpenAI baseURL
이중 API Key 와 Project ID 는 .env 파일(로컬 실행시) 에 하드코딩 하고, 실제 배포시에는 slack env add 를 통해 입력합니다. baseURL 은 변경되지 않아서 소스코드에 넣었습니다. v4.56.0 버전기준입니다. 예전버전에서는 Project ID 와 baseURL 은 요구하지 않았는데 지금은 저값을 요구해서 한참 해맸네요..
Adding the Function to your Manifest
다음은 Manifest 에 좀전에 작성한 function 을 추가합니다. 폴더내에 manifest.ts 파일을 엽니다. 정의한 Function 을 import 하고, functions array 에 해당 항목을 추가합니다. 그럼 아래와 같을 것입니다.
import { Manifest } from "deno-slack-sdk/mod.ts";
import { AnswerPromptDefinition } from "./functions/answer_prompt.ts"; // Function 임포트

/**
 * The app manifest contains the app's configuration. This
 * file defines attributes like app name and description.
 * https://api.slack.com/future/manifest
 */
export default Manifest({
  name: "chatgpt-wfb",
  description: "A blank template for building Slack apps with Deno",
  icon: "assets/default_new_app_icon.png",
  functions: [AnswerPromptDefinition], // AnswerPromptDefinition 추가.
  workflows: [],
  outgoingDomains: ["api.openai.com"],
  botScopes: ["commands", "chat:write", "chat:write.public"],
});
여기까지 되었으면 앱을 한번 실행해보겠습니다.
Running Your App Locally
byounghee.kim@byoungh-ltm7jqg chatgpt-wfb % slack run
? Choose a local environment Install to a new team
? Install to a new team byounghee-demo-grid E06PZNBPJSX

🔔 If you leave this team, you can no longer manage the installed apps
   Installed apps will belong to the team if you leave the workspace

💡 Your app will be installed to the "byounghee-demo-grid" organization
   If you'd like, you can restrict access to only users in a particular workspace

? Choose a workspace to grant access: Grid Demo T06Q3P44MGV
Updating local app install for "Byounghee - GRID"

⚡ Listing triggers installed to the app...
   There are no triggers installed for the app

⚡ Create a trigger
   Searching for trigger definition files under 'triggers/*'...
   No trigger definition files found
   Learn more about triggers: https://api.slack.com/automation/triggers/link

✨ primary-owner of Byounghee - GRID
Connected, awaiting events
자 일단 실행은 잘 되었습니다. 한번 보죠.
Workflow Builder 로 이동해서 우측의 맨 아래의 사용자 지정 항목에 들어가면 우리가 좀전에 배포한 Custom Function 이 보입니다.
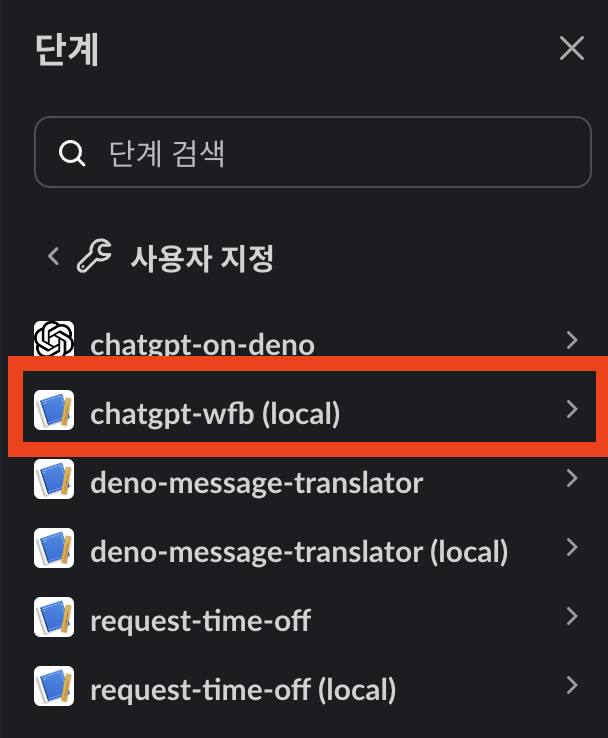
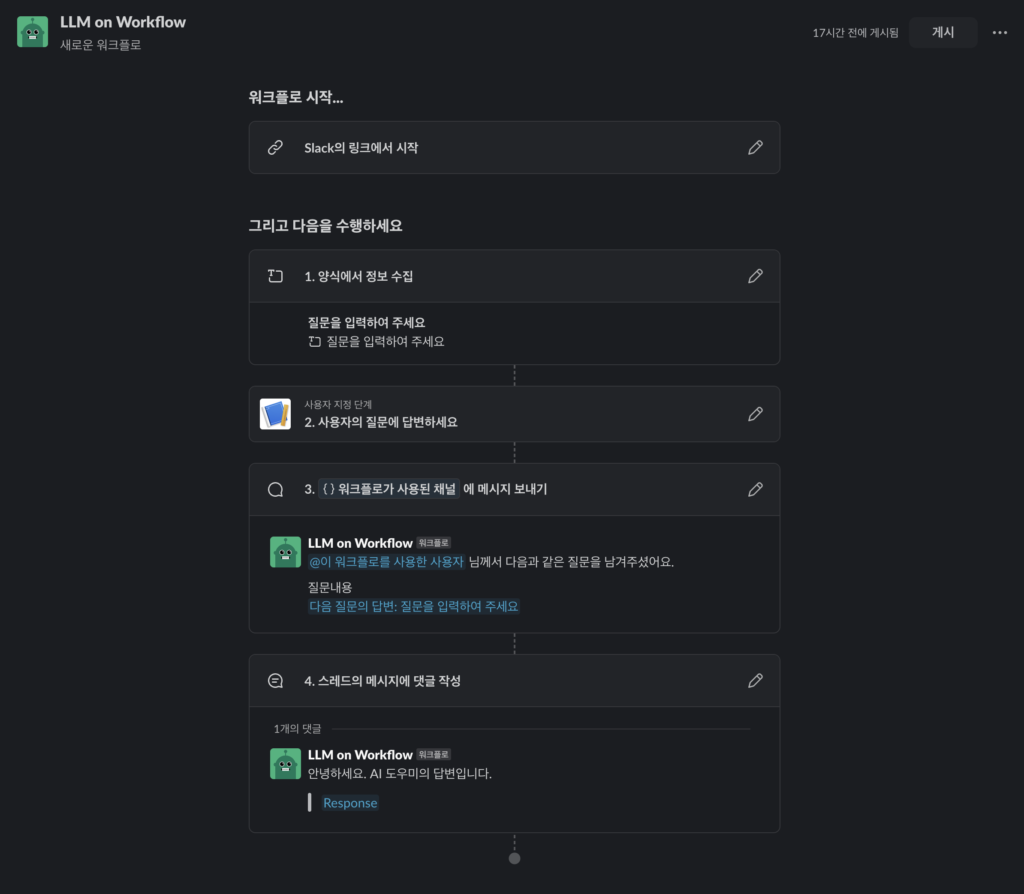
현재는 local 에서 실행중이기 때문에 (local)표시가 있죠. 자 이 스텝을 이용해서 다음과 같이 workflow 을 구성해 보았습니다.
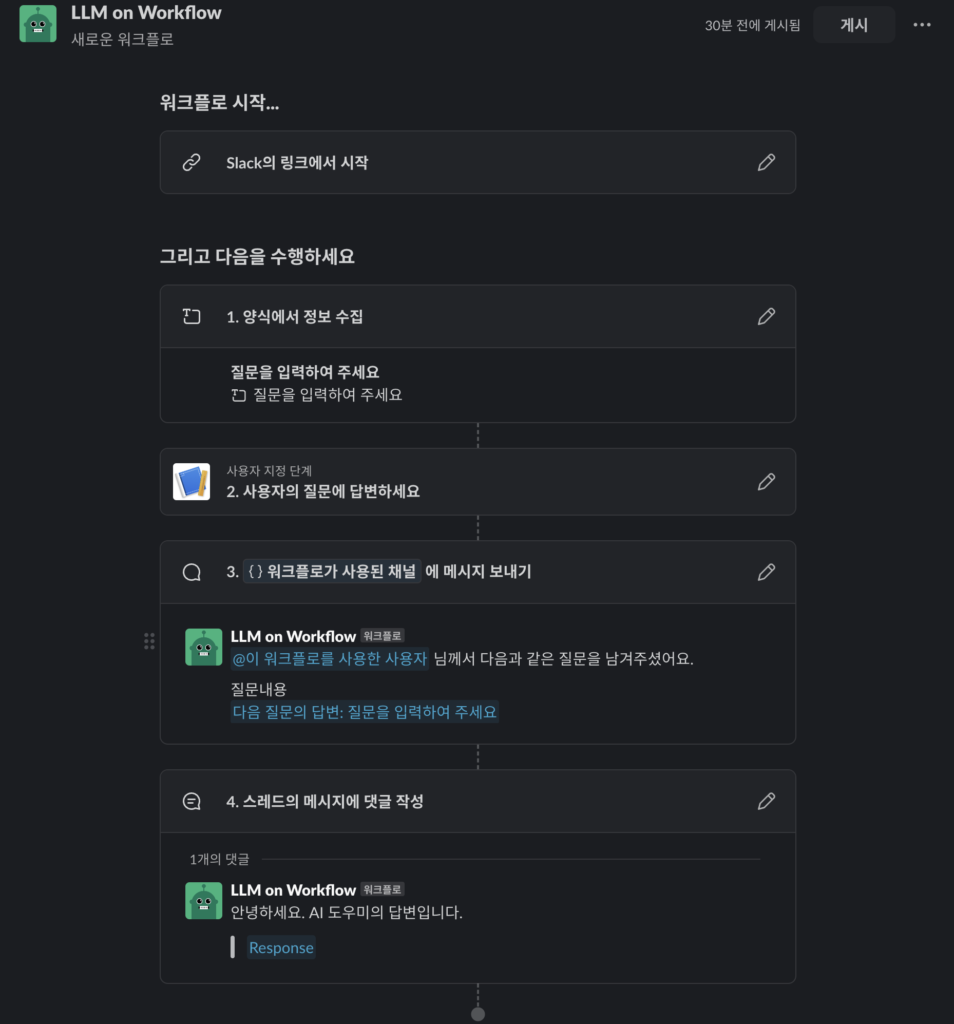
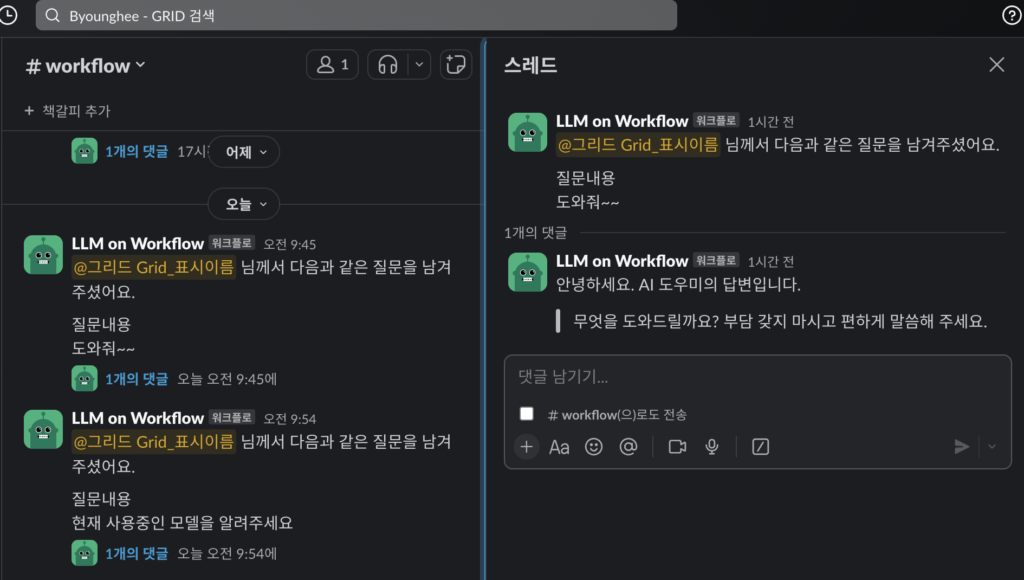
요약하면, 사용자 질문을 입력받고, 입력 받은 질문에 대한 답을 ChatGPT 를 통해 답변을 생성해 낸뒤, 해당 답변을 스레드에다가 다는 형태입니다. 실제 실행 결과를 한번 보죠.
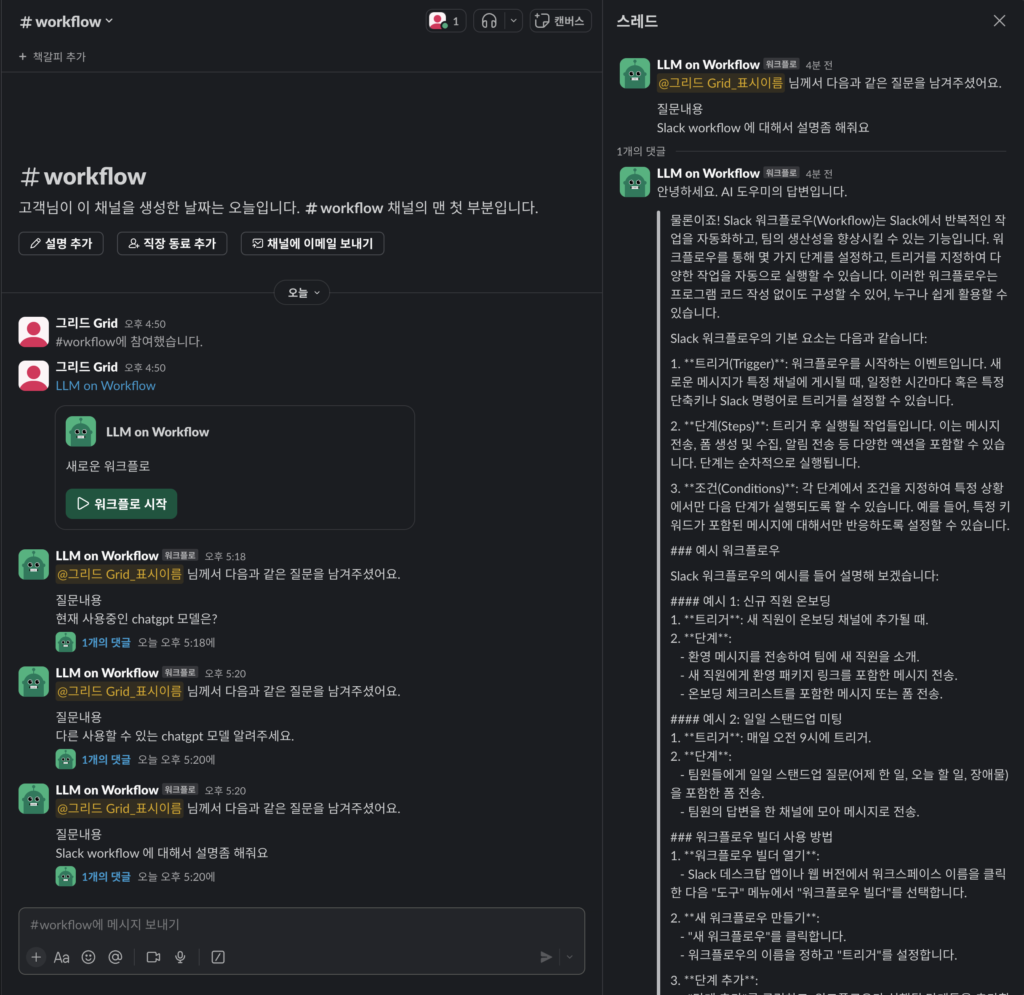
위의 워크플로를 좀 더 활용하자면, AI 답변으로 충분하지 않을 경우, 질문한 유저가 별도의 이모지를 넣고, 해당 이모지가 들어오면 또 다른 워크플로를 실행하여 사람을 호출하는 형태로도 만들수도 있겠습니다.
Running Your App on Slack Infrastructure
자 이제 실행이 잘 되는듯 하니 기존 앱의 실행은 중단하고 ROSI (Run On Slack Infrastructure) 에 배포해보죠. slack run 이 아닌 slack deploy 명령어를 실행하여 줍니다.
byounghee.kim@byoungh-ltm7jqg chatgpt-wfb % slack deploy
? Choose a deployed environment Install to a new team
? Install to a new team byounghee-demo-grid E06PZNBPJSX

🔔 If you leave this team, you can no longer manage the installed apps
   Installed apps will belong to the team if you leave the workspace

💡 Your app will be installed to the "byounghee-demo-grid" organization
   If you'd like, you can restrict access to only users in a particular workspace

? Choose a workspace to grant access: All of them
📚 App Manifest
   Creating app manifest for "chatgpt-wfb" in "Byounghee - GRID"

🏠 App Install
   Installing "chatgpt-wfb" app to "Byounghee - GRID"
   Updated app icon: assets/default_new_app_icon.png
   Finished in 4.1s

⚡ Listing triggers installed to the app...
   There are no triggers installed for the app

⚡ Create a trigger
   Searching for trigger definition files under 'triggers/*'...
   No trigger definition files found
   Learn more about triggers: https://api.slack.com/automation/triggers/link


🎁 App packaged and ready to deploy
   0.044MB was packaged in 1.2s

🚀 chatgpt-wfb deployed in 3.0s
   Dashboard   :  https://slack.com/apps/A07JG16AK7G
   App Owner   :  primary-owner (U06PT6YLN22)
   Organization:  Byounghee - GRID (E06PZNBPJSX)

🌩  Visit Slack to try out your live app!
   When you make any changes, update your app by re-running slack deploy
   Review the current activity logs using slack activity --tail

💌 We would love to know how things are going
   Survey your development experience with slack feedback --name platform-improvements

byounghee.kim@byoungh-ltm7jqg chatgpt-wfb %
다음 API 키값과 Project ID 를 환경번수로 넣는것도 잊지 마시구요. 아래 값은 예시 입니다.
slack env add OPEN_AI_KEY sk-proj-.......NYG8A
? Choose a deployed environment byounghee-demo-grid E06PZNBPJSX A07JG16AK7G
 APP  A07JG16AK7G
✨  successfully added OPEN_AI_KEY to app environment variables

slack env add OPENAI_PROJECT_ID proj_.....opr
? Choose a deployed environment byounghee-demo-grid E06PZNBPJSX A07JG16AK7G
 APP  A07JG16AK7G
✨  successfully added OPENAI_PROJECT_ID to app environment variables
다시 Workflow Builder 의 사용자 지정 항목에 가보면 (local) 항목이 없는것이 생성된 것을 볼 수 있습니다.
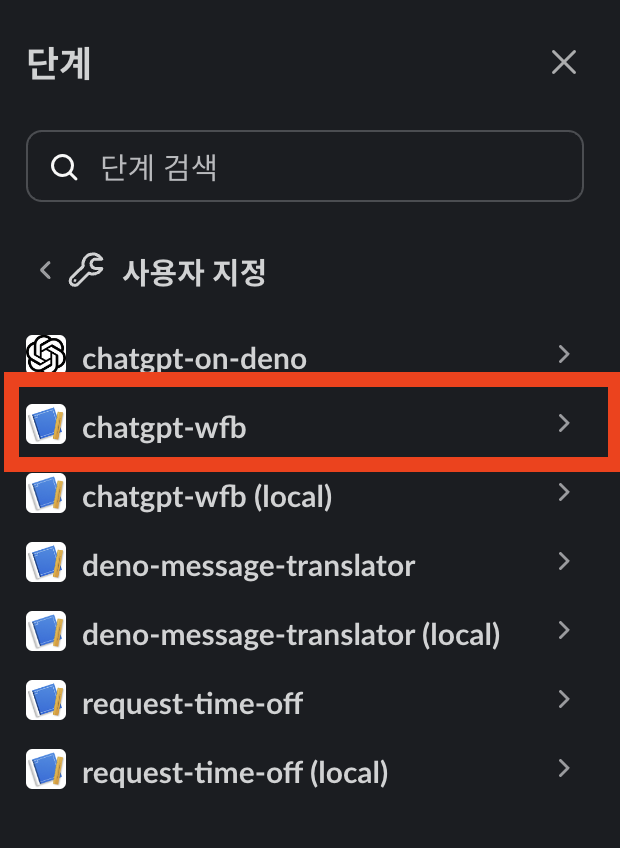
아래 local 앱은 실행을 중단한 상태이기 때문에, 현재 상태로 워크플로를 실행하면 당연히 에러가 나겠죠. 그래서 배포한 것으로 바꿔주겠습니다. 중간에 스텝만 바꿨기 때문에 변경된것 없습니다. 스텝이 바뀌면서 4번 스텝의 Response 변수가 유효하지 않아지기 때문에 그것도 다시 입력해주시면 됩니다.
다시 워크플로를 실행해보면 이전과 동일하게 실행이 잘 되는 것을 확인할 수 있습니다. 당연하겠죠 실행위치만 바뀌었으니까요.
다음 커맨드를 통해 로그도 확인해보겠습니다.
slack acitivity

2024-08-28 09:58:42 [info] [Wf07JKF0318D] (Trace=Tr07KGDQ4L9W) Workflow step '사용자의 질문에 답변하세요' completed
☁️  2024-08-28 10:00:13 [info] Application Updated by user 'U06PT6YLN22' on team 'E06PZNBPJSX'
☁️  2024-08-28 10:07:19 [info] Application Updated by user 'U06PT6YLN22' on team 'E06PZNBPJSX'
2024-08-28 10:07:48 [info] [Fn07JR4N092Q] (Trace=Tr07JM2B9R8E) Function '사용자의 질문에 답변하세요' (app function) started
2024-08-28 10:07:51 [info] [Fn07JR4N092Q] (Trace=Tr07JM2B9R8E) Function '사용자의 질문에 답변하세요' (app function) completed
2024-08-28 10:07:51 [info] [Fn07JR4N092Q] (Trace=Tr07JM2B9R8E) Function output:
        gpt-4o-mini-2024-07-18
2024-08-28 10:07:51 [info] [Wf07JKF0318D] (Trace=Tr07JM2B9R8E) Workflow step '사용자의 질문에 답변하세요' completed
문제가 있는 경우엔 다음과 같이 에러도 확인하실 수 있습니다.
2024-08-28 09:40:12 [info] [Fn07JR4N092Q] (Trace=Tr07KGC5TKLG) Function '사용자의 질문에 답변하세요' (app function) started
2024-08-28 09:40:13 [info] [Fn07JR4N092Q] (Trace=Tr07KGC5TKLG) Function output:
        Caught error from user supplied module: PermissionDenied: Requires env access to "OPENAI_PROJECT_ID", run again with the --allow-env flag
            at Object.getEnv [as get] (ext:runtime/30_os.js:124:10)
            at readEnv (file:///var/task/functions/answer_prompt.js:4410:31)
            at new OpenAI (file:///var/task/functions/answer_prompt.js:7637:152)
            at AsyncFunction.<anonymous> (file:///var/task/functions/answer_prompt.js:7769:20)
            at Module.handlerModule (file:///var/task/functions/answer_prompt.js:2097:32)
            at Object.RunFunction [as function_executed] (file:///opt/runtime.js:1683:83)
            at DispatchPayload (file:///opt/runtime.js:1790:53)
            at async run (file:///opt/runtime.js:1857:18)
            at async serveHttp (file:///opt/runtime.js:1885:38)
2024-08-28 09:40:13 [error] [Fn07JR4N092Q] (Trace=Tr07KGC5TKLG) Function '사용자의 질문에 답변하세요' (app function) failed
        event_dispatch_failed
2024-08-28 09:40:14 [error] [Wf07JKF0318D] (Trace=Tr07KGC5TKLG) Workflow step '사용자의 질문에 답변하세요' failed
참고 하시기 바랍니다. 향후에는 더 큰 그림(?) 도 있을 예정입니다. 조금만 기다려주세요!